How to Add a New Screen Layout Button
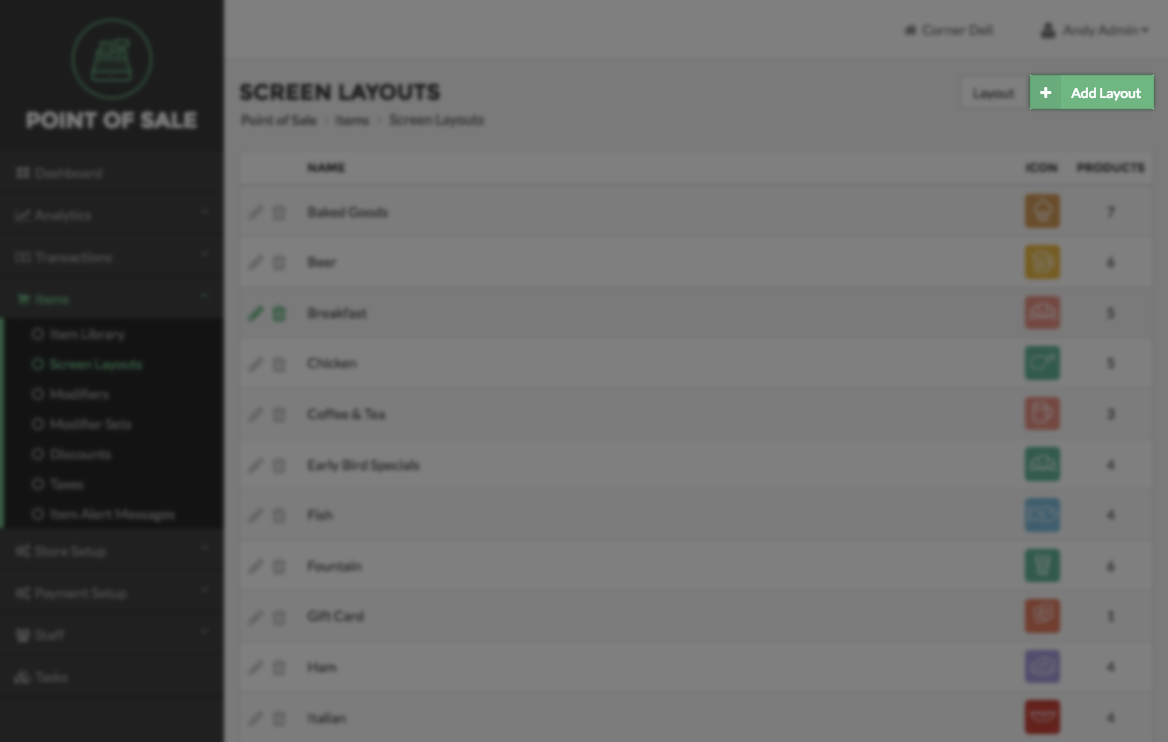
To add a new Screen Layout Button, select Items on the left side of the Navigation Menu, and then select Screen Layouts from the listings. On the Screen Layout page select the Add Layout button located at the top right side of the screen. This will direct you to the Add Screen Layout page.
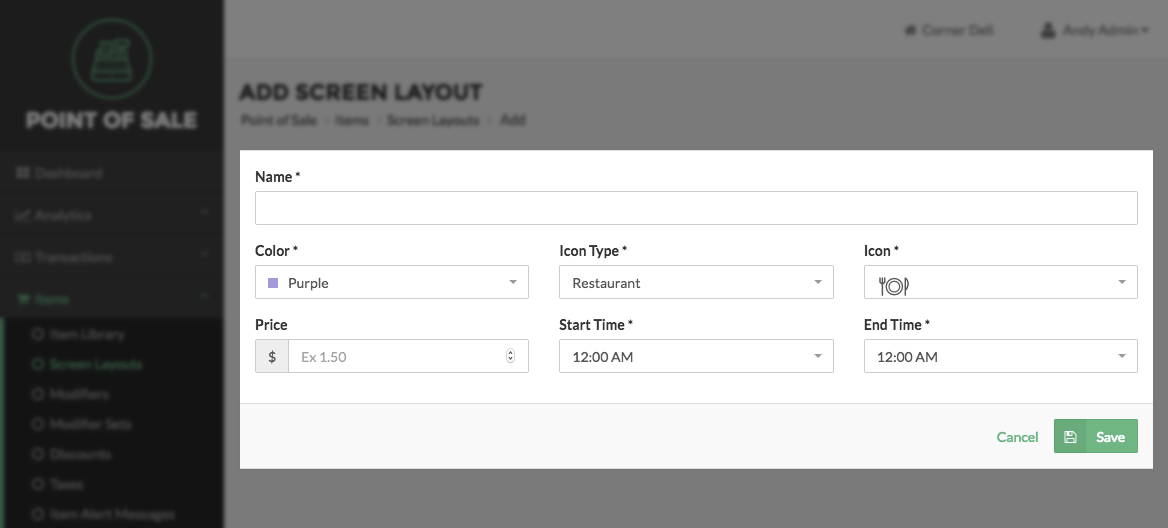
On the Add Screen Layout page, enter a Name for the Screen Layout Button. Make sure it is unique and descriptive. Then select a Color, Icon Type, and Icon for the Screen Layout Button. If you would like to set a Price for the Items within the Layout Button, enter it in the text box below Price. Then enter a Start and End Time for the Screen Layout Button. If you would like the Items in the Layout Button to be available whenever your business is open, set both the Start and End Time to 12:00 am. Otherwise, select the time frame you want the Items available by choosing a time from the drop down menus below Start and End Time. Click the Save Button to save your entries. You will be taken to the Edit Screen Layout page to finish the Add Screen Layout process. If you do not wish to save your work, click Cancel. You will be directed back to the Screen Layouts page.
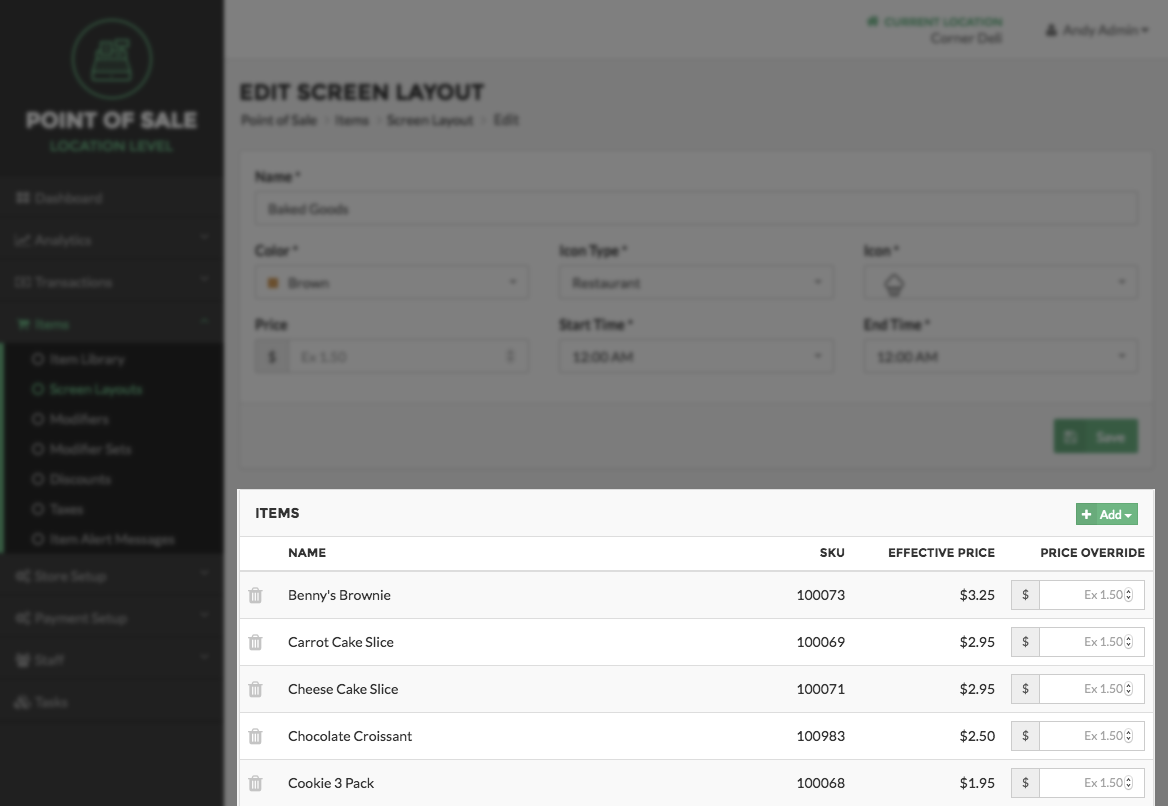
On the Edit Screen Layout page there is a panel named Items where you can add Items to the Layout Button. Press the Add Button at the top of the Items Panel to open a pop-up with your Item Library Table. Find the Items you would like in the Screen Layout Button by expanding the table, then check the checkbox next to each Item to be included, and press the Save Button at the bottom of the pop-up to add the Items to the Item Panel. At this point, you may also choose to enter a new Price for a Item in the Price Override column, which will override its Account and Layout Button Level Price. When you have finished adding Items to the Screen Layout Button, click the Save Button in the Item Panel. Press the Done Button to return to the Screen Layouts page.
Step by Step Summary
- Select Items on the left side of the Navigation Menu, and the choose Screen Layouts from the listings.
- Click the Add Layout Button in the top right corner of the screen
- On the Add Screen Layout page, enter a Name for the Layout Button
- Then select a Color, Icon Type, and Icon for the Layout Button
- Set the Start and End Time for when the Items in the Layout Button will be available.
- If you would like the Items in the Screen Layout to be available whenever your business is open, set both the Start and End Time to 12:00 am
- Click the Save Button to save your entries and move to the Edit Screen Layout page
- Press the Add Button at the top of the Items Panel to open a pop-up with your Item Library Table
- Find the Items you would like in the Layout Button by expanding the table
- Check the checkbox next to each Item to be assigned to the Screen Layout Button
- Press the Save Button at the bottom of the pop-up to add the Items to the Item Panel
- Click the Save Button in the Item Panel
- Press the Done Button to return to the Screen Layouts page