How to Edit Register Settings
Using the Heartland Point of Sale app, you can easily edit the settings for you register. The settings you change here will only be unique to the register you are logged into. The Register Settings Screen can be accessed by pressing the pressing the More Button on the Home Screen, and then selecting the Register Settings options from the pop-up that appears. This screen allows you to add, edit, connect, and configure various devices with your Heartland Point of Sale app.
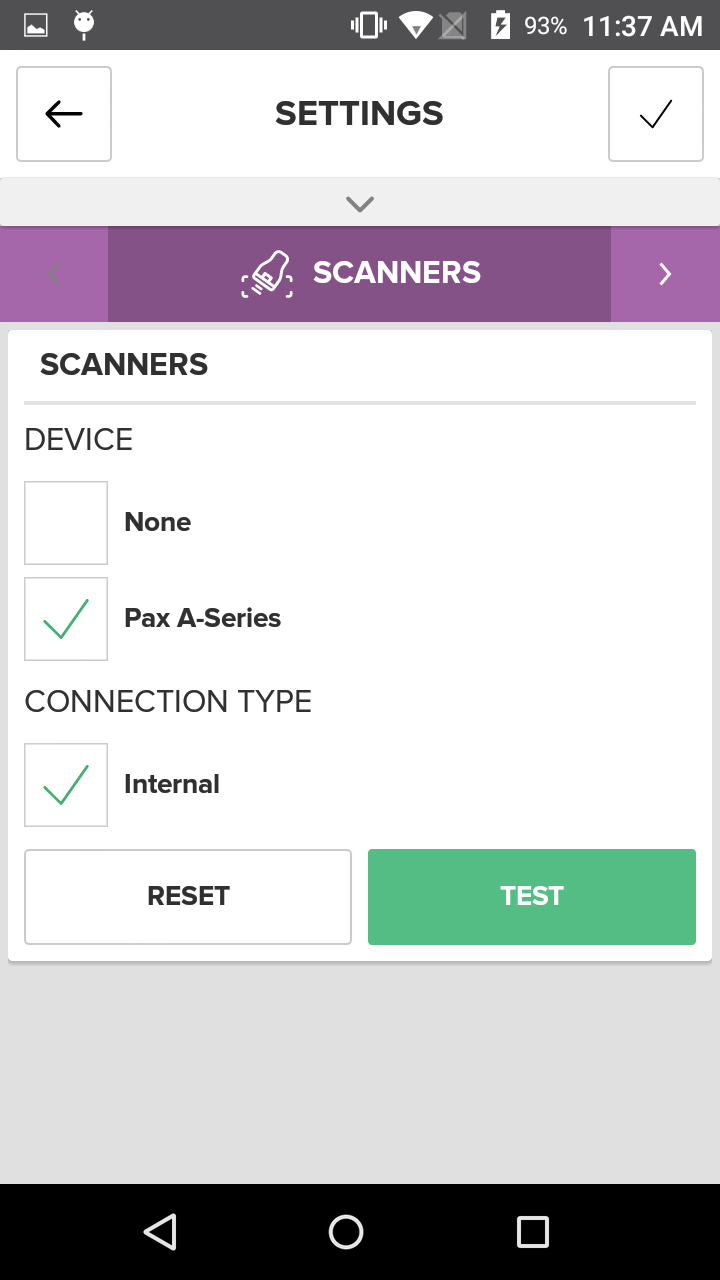
HOW TO ASSIGN A SCANNER TO A REGISTER
Barcode Scanners are an integral part of many restaurant, retail, and service industry operations. Some all-in-one point-of-sale solutions have built-in scanning devices, while others support third party, stand-alone scanners.
On the Scanners screen select the Scanner you would like to assign to the Register from the options listed under the Device section. Once you have selected a Scanner, the Connection Drop Down Menu will become available; click on it and select how your Register will connect to the Scanner (via Internal, Bluetooth, USB, or TCP/IP). Once you select your Connection Type, if a Bluetooth Address or IP Address is required, the Address Text Box will become available. You will need to enter the appropriate address in this text box to ensure that the Register and Scanner can connect properly. Click the Save Button (represented by a Check Mark) at the top right of the screen.

QUICK SUMMARY
- Press the More Button on the Home Screen and choose Register Settings
- Choose which Scanner you would like to assign to the Register
- In the Connection Drop Down Menu, select how your Register will connect to the Accessory Display
- If a Bluetooth Address or IP Address is required, the Address Text Box will become available
- Enter the appropriate address in the Address Text Box
- Click the Save Button (represented by a Check Mark) at the top right of the screen
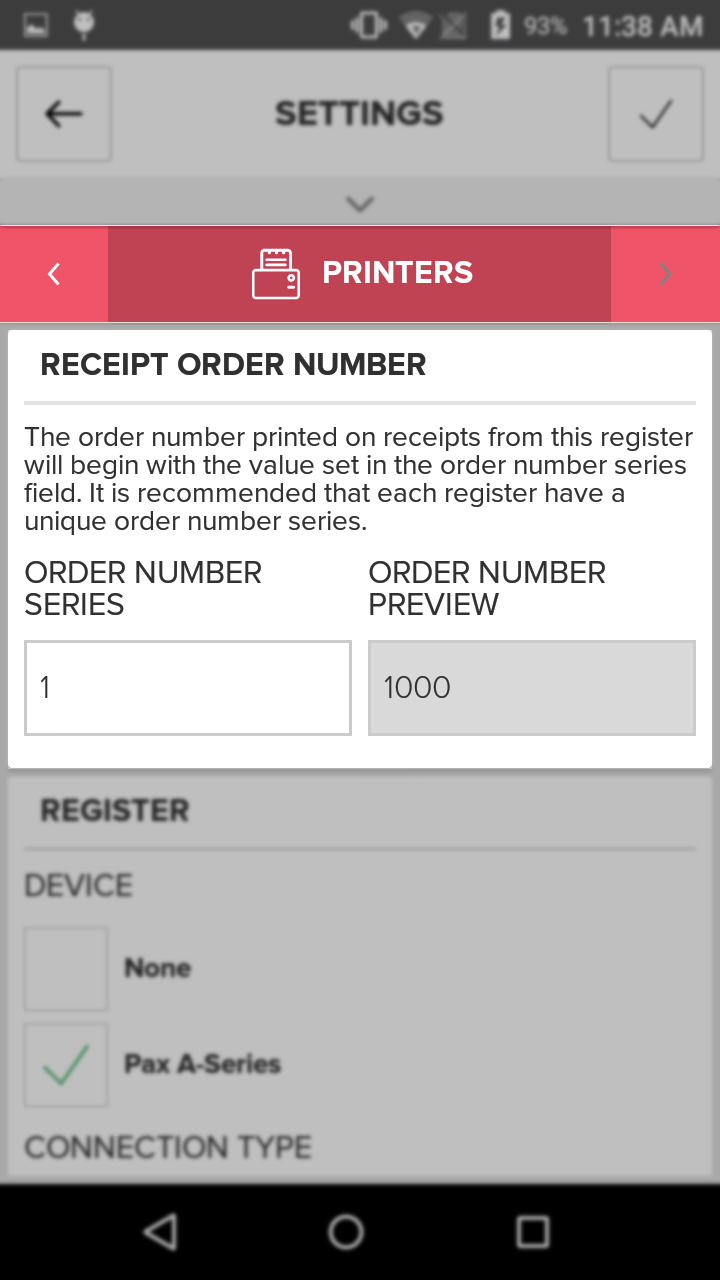
HOW TO ASSIGN A RECEIPT ORDER NUMBER
Order Numbers on printed and emailed receipts can be confusing when using more than one register at a single location. This is because the order numbers automatically default to a numerical value that is sequential, starting at 1, and will increase with each new order generated. These numerical values will be reset whenever a batch is closed and a new batch is opened for a register. To help prevent there from being multiple orders with the same order number you can assign a prefix number to the order numbers. The prefix is a two digit number that is added to the beginning of the order number and will be unique to each register. By setting the prefix for each register differently you will then be able to easily distinguish between orders that are placed from multiple registers.
On the Printers screen, click the Order Number Series text box, on the Receipt Order Number section, and then enter a unique one or two digit number that you wish to become the prefix to the Order Number. To the right of the Order Number Series text box there is a Order Number Preview box. This display an example of what the Receipt Order Number will look like on a printed or emailed receipt when an order is generated. Click the Save Button (represented by a Check Mark) at the top right of the screen.

Quick Summary
- Press the More Button on the Home Screen and choose Register Settings
- Click the Order Number Series text box.
- Enter a unique one or two digit number that you wish to become the prefix to the Order Number
- Preview the example in the Order Number Preview box
- Click Save Button (represented by a Check Mark) at the top right of the screen
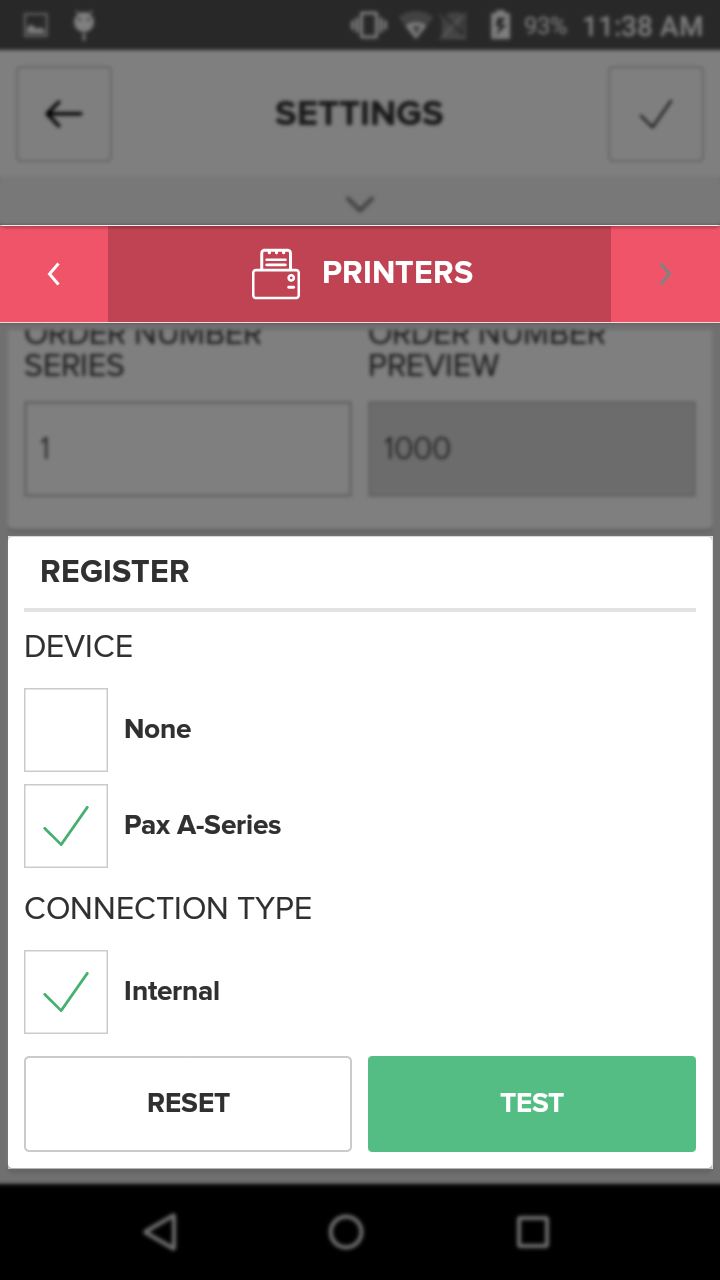
HOW TO ASSIGN RECEIPT PRINTERS TO A REGISTER
On the Printers screen select the Printer you would like to assign to the Register from the options listed under the Device section. After selecting the Printer, the Connection Drop Down Menu will become available; click on it and select how your Register will connect to the Scanner (via Internal, Bluetooth, USB, or TCP/IP). Once you select your Connection Type, if a Bluetooth Address or IP Address is required, the Address Text Box will become available. You will need to enter the appropriate address in this text box to ensure that the Register and Printer can connect properly. Click the Save Button (represented by a Check Mark) at the top right of the screen.

QUICK SUMMARY
- Press the More Button on the Home Screen and choose Register Settings
- On the Printers screen select the Printer you would like to assign to the Register from the options listed under the Device section
- In the Connection Drop Down Menu, select how your Register will connect to the Accessory Display
- If a Bluetooth Address or IP Address is required, the Address Text Box will become available
- Enter the appropriate address in the Address Text Box
- Click the Save Button (represented by a Check Mark) at the top right of the screen.
Concept Information
Related Tasks